These take a little more time than my regular Salted Nut Roll Bars but are worth the extra effort (which isn't really much). :) They are tasty and have totally satisfied my bar-craving (along with the Twix Bars I just made). It's a great recipe for me because I had most of the ingredients in my house and I really needed to use up that little bit of Rice Krispies left over from Rice Krispie bars.
Salted Peanut Bars
Crust:
1/2 cup soft margarine
2/3 cup brown sugar
2 egg yolks
1 tsp vanilla
1 1/2 cups flour
1/4 tsp baking soda
1/2 tsp baking powder
1/2 tsp salt
3 cups mini marshmallows
Topping:
2 cups Rice Krispies
2 cups salted peanuts
2/3 cup corn syrup
1/4 cup oleo or butter
2 tsp vanilla
1 (12oz) pkg peanut butter chips
Crust: Mix all crust ingredients together, except the marshmallows, in a large bowl until crumbly. Press firmly in to a greased 9x13 pan. Bake at 350 for 12-15 minutes. Sprinkle with the marshmallows and return to oven for 2 minutes, until marshmallows begin to puff. Cool while making topping.
Topping: Combine corn syrup, oleo, vanilla and peanut butter chips in a large pan until melted and smooth, stirring constantly. Remove from heat and stir in peanuts and Rice Krispies. Spoon over marshmallows and crust to cover. Refrigerate until firm. Cut into bars.
Enjoy!!
Monday, December 19, 2011


Saturday, December 17, 2011
Twix Bars
I'd have to say that The Hull Christian School Cookbook is my go-to for baking. It has some great recipes for cookies, bars and snacks. It's my favorite for homemade goodies. I had to call one of my dear sisters-in-law for some clarification as she grew up using this cookbook just like me. :) With her help and a call to her mom, these Twix Bars turned out delicious!!
Twix Bars
1 tube refrigerated cookie dough
1 (14oz) pkg caramels
1 can sweetened condensed milk
3/4 stick oleo (I used margarine)
1 (12oz) pkg milk chocolate chips
1 1/2 cups creamy peanut butter
Spread cookie dough on a greased jellyroll pan (it will make a thin crust). Bake in a 350 degree oven until golden brown (about 12-14 min). Melt the caramels, sweetened condensed milk and oleo, and spread on cookie crust. Refrigerate 1 hour. Melt chocolate chips and peanut butter and spread on caramel layer. Refrigerate until firm. Then cut into squares.
Enjoy!!
Twix Bars
1 tube refrigerated cookie dough
1 (14oz) pkg caramels
1 can sweetened condensed milk
3/4 stick oleo (I used margarine)
1 (12oz) pkg milk chocolate chips
1 1/2 cups creamy peanut butter
Spread cookie dough on a greased jellyroll pan (it will make a thin crust). Bake in a 350 degree oven until golden brown (about 12-14 min). Melt the caramels, sweetened condensed milk and oleo, and spread on cookie crust. Refrigerate 1 hour. Melt chocolate chips and peanut butter and spread on caramel layer. Refrigerate until firm. Then cut into squares.
Enjoy!!
Saturday, December 10, 2011
House Update
I've been doing all kinds of little projects around the house but thought I'd keep my promise and take you all along for the ride. That's really hard to do, being a perfectionist and all. So here are a few pictures from around the house and I'm sure I'll take time to tell each story and give you a tutorial I'll be sure to give you a quick overview. :) These pictures were taken in November hence the fallish decor.

Here's part of our kitchen/office area. I made the curtain out of some flour towels and some scraps of fabric. It's really too short for this space but I haven't had the heart to move it to the window above the sink (not as tall) because I'm going to have to alter it and I'm not too excited to do that. You can kind of see our aqua cabinets that I love! We haven't gotten the doors on them yet and I don't know that I'll put the top doors on as I'm really enjoying having them open. I also got the idea to hang our colander's on the wall from a family at church. This is one of my favorite areas to be in during the day. I can be on my computer, watching the boys out the window and enjoying a cup'o joe. But looking at that curtain in the picture is paining me so that's maybe next on my to-do list.

This little light is in our kitchen. It's made from an old milk-separator I got at a junk store. My husband turned it into a light for the kitchen and I love it's feel. You can also see where I proudly display my recipe books. I love the way the red contrasts with the aqua. :)

Here's our school calendar. Since it hangs in our dining room I wanted it to be functional but not make our dining space look like a kindergarten classroom. I got an old screen window from a friend and I spray painted it cream and then sanded it to make it look rustic. That way a little of the rusty read shows through on the edges. I really like how it turned out. I used some scrapping paper to make the calendar outline and then designed some squares to fit. It was a long process to decide what to do about holidays and birthdays but I made some generic birthday/anniversary cards and we use a wet-erase marker to write names of family and friends. They are all attached by velcro so it makes changing things easy. We use the little red paper clip to mark what day it is. I really like how it turned out - functional and vintagey all at the same time.

Here's a picture of our bathroom. Well, to be specific our shower/tub. I made the bunting (the same that's on the bookshelf in the living room) to add some color to the room without having to buy a shower curtain that was patterned. This way I can change the color or feel of the room without having to buy a new curtain. I still need a little something to hang over the toilet but it looks better than it did when it was all white. :) Oh, and we got one of those "fancy" hotel curtain rods that create a little more "space" in the shower. It's been really nice!!

This is a picture of the shelving that's in our bathroom. We decided to keep the doors off the top half of the built-in and paint the back wall of the shelves the same aqua that's in the kitchen. I really like the idea of keeping the colors the same throughout the main rooms of the house so if you want to "redecorate" things in one room you can just move items around. Makes redecorating cheap and easy. :) I added red cloth bins for storing larger items.

I love the look of vintage blue Ball jars. Here I put two on the counter to store cotton balls and cotton swabs. There are some on the shelf too, that hold shells and other little cutesy items. I also love how the gray towel pulls the gray out of the jar lids. It's the little things that make me happy.

This is our living room. You can see that little crate bookshelf next to the door that goes to the garage. We hung coat hooks by the garage door and the front door. That way we have a home for our things no matter what door we enter. The embroidery hoops over the couch are filled with fabric cut from fat-quarters from our local quilting store. And I made the "V" with buttons from my Grandma's button tin that I got after she passed away. I added a few red buttons in the "V" to add a little color. I made the pillows on the couch from our old throw pillows. They matched the couches that are in the basement and they do not look good with the current theme I have going so I decided to recover them with slip-covers so I can wash the drool right off of them. :) The first one is made with some turquoise fabric and then I made some bunting with red-polka-dot pennants. I think it turned out pretty cute and didn't really cost me a thing. And the cream pillow behind it has some stacked flowers sewn on it. They're both pretty simple and the best part is that I can wash them.

The next two pictures are just some decorations I put up for fall. We don't really decorate for Halloween and I want to remain frugal so I decorate for the season instead of the holiday as it lasts longer. This is a little print I made of the hymn, Come, Ye Thankful People, Com. And I used some scrabble tiles to make the words "Give Thanks." The candle is a generic one with some twine tied around it. And it's all setting on top of a piece of burlap that I use as a table runner.

This is an idea I got from Maggie. Her mom had something similar to this in her home and I loved it. It's a pie tin with an old cheese-grater. It's filled with potpouri and the best part is that there's a candle under the grater. The light makes little stars when it's lit. Right now I have pine cones in the pie tin and a Christmas candle underneath to make it smell like we have a fresh tree when ours is a plastic as they come.

Well, that's a short preview of some of the things we've been doing around the house. We've officially stopped on the major decorating/renovating as unexpected things have been popping up that need our attention and our funds more than the aesthetic things we were focusing on before. Hope you enjoyed this little tour and hopefully I'll have more exciting things to show you in the future. :)
before and after's to come "soon"
Here's a bookshelf that's in the process. I just used some old fruit crates and stacked 'em. The top "display shelf" is built out of an old wooden palette. I made the bunting for the bathroom but had a little extra so I added it to the shelf for some color.

Here's part of our kitchen/office area. I made the curtain out of some flour towels and some scraps of fabric. It's really too short for this space but I haven't had the heart to move it to the window above the sink (not as tall) because I'm going to have to alter it and I'm not too excited to do that. You can kind of see our aqua cabinets that I love! We haven't gotten the doors on them yet and I don't know that I'll put the top doors on as I'm really enjoying having them open. I also got the idea to hang our colander's on the wall from a family at church. This is one of my favorite areas to be in during the day. I can be on my computer, watching the boys out the window and enjoying a cup'o joe. But looking at that curtain in the picture is paining me so that's maybe next on my to-do list.

This little light is in our kitchen. It's made from an old milk-separator I got at a junk store. My husband turned it into a light for the kitchen and I love it's feel. You can also see where I proudly display my recipe books. I love the way the red contrasts with the aqua. :)

Here's our school calendar. Since it hangs in our dining room I wanted it to be functional but not make our dining space look like a kindergarten classroom. I got an old screen window from a friend and I spray painted it cream and then sanded it to make it look rustic. That way a little of the rusty read shows through on the edges. I really like how it turned out. I used some scrapping paper to make the calendar outline and then designed some squares to fit. It was a long process to decide what to do about holidays and birthdays but I made some generic birthday/anniversary cards and we use a wet-erase marker to write names of family and friends. They are all attached by velcro so it makes changing things easy. We use the little red paper clip to mark what day it is. I really like how it turned out - functional and vintagey all at the same time.

Here's a picture of our bathroom. Well, to be specific our shower/tub. I made the bunting (the same that's on the bookshelf in the living room) to add some color to the room without having to buy a shower curtain that was patterned. This way I can change the color or feel of the room without having to buy a new curtain. I still need a little something to hang over the toilet but it looks better than it did when it was all white. :) Oh, and we got one of those "fancy" hotel curtain rods that create a little more "space" in the shower. It's been really nice!!

This is a picture of the shelving that's in our bathroom. We decided to keep the doors off the top half of the built-in and paint the back wall of the shelves the same aqua that's in the kitchen. I really like the idea of keeping the colors the same throughout the main rooms of the house so if you want to "redecorate" things in one room you can just move items around. Makes redecorating cheap and easy. :) I added red cloth bins for storing larger items.

I love the look of vintage blue Ball jars. Here I put two on the counter to store cotton balls and cotton swabs. There are some on the shelf too, that hold shells and other little cutesy items. I also love how the gray towel pulls the gray out of the jar lids. It's the little things that make me happy.

This is our living room. You can see that little crate bookshelf next to the door that goes to the garage. We hung coat hooks by the garage door and the front door. That way we have a home for our things no matter what door we enter. The embroidery hoops over the couch are filled with fabric cut from fat-quarters from our local quilting store. And I made the "V" with buttons from my Grandma's button tin that I got after she passed away. I added a few red buttons in the "V" to add a little color. I made the pillows on the couch from our old throw pillows. They matched the couches that are in the basement and they do not look good with the current theme I have going so I decided to recover them with slip-covers so I can wash the drool right off of them. :) The first one is made with some turquoise fabric and then I made some bunting with red-polka-dot pennants. I think it turned out pretty cute and didn't really cost me a thing. And the cream pillow behind it has some stacked flowers sewn on it. They're both pretty simple and the best part is that I can wash them.

The next two pictures are just some decorations I put up for fall. We don't really decorate for Halloween and I want to remain frugal so I decorate for the season instead of the holiday as it lasts longer. This is a little print I made of the hymn, Come, Ye Thankful People, Com. And I used some scrabble tiles to make the words "Give Thanks." The candle is a generic one with some twine tied around it. And it's all setting on top of a piece of burlap that I use as a table runner.

This is an idea I got from Maggie. Her mom had something similar to this in her home and I loved it. It's a pie tin with an old cheese-grater. It's filled with potpouri and the best part is that there's a candle under the grater. The light makes little stars when it's lit. Right now I have pine cones in the pie tin and a Christmas candle underneath to make it smell like we have a fresh tree when ours is a plastic as they come.

Well, that's a short preview of some of the things we've been doing around the house. We've officially stopped on the major decorating/renovating as unexpected things have been popping up that need our attention and our funds more than the aesthetic things we were focusing on before. Hope you enjoyed this little tour and hopefully I'll have more exciting things to show you in the future. :)
before and after's to come "soon"
Monday, November 28, 2011
Mike Mulligan and Legos
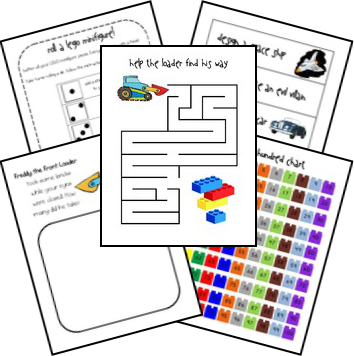
I found some great resources to use along with our Mike Mulligan and His Steam Shovel FIAR unit. And it involves lots of Legos!! Which we are complete fans of around here. Hope you enjoy!!
Learning with Legos (Junior Version) by Walking by the Wayside
Lego Memory Game Cards by I Sew, Do You?
Sunday, November 27, 2011
Five in a Row: Weeks 5-12
We are finally caught up after missing a week of school in October due to two bouts of stomach flu - not pretty. So I wanted to update you on all our goings-on in our little schoolhouse. We've enjoyed many books through Five in a Row and have really enjoyed using our world map on a regular basis. Some weeks we do a lot of activities inspired by the books we read and some weeks we do the minimum as our schedule allows. Without further ado here's what we've been up to. :)
 Week 5 - The Rag Coat
This was the week that Asher was sick so we did the minimum. We enjoyed reading about the Applachian experience through reading The Rag Coat. The only activity we did during this week was quilting. Yep, I let my little boy use my sewing machine - with LOTS of supervision. Plus he was terrified of getting stuck with a needle so he was pretty respectful of the machine. We took old scraps of fabric and sewed them together and added a piece of fabric to back it. It worked out well but I don't think I'll scare him with the sewing machine for a while. :)
 Week 6 - The Glorious Flight
We really enjoyed this book and learning some French names was a highlight (Blair-You). The boys loved laughing like French men, "Hugh, hugh, hugh!" :D Made me laugh!! We colored paper and made them into paper airplanes flying them across the yard. We also took a trip to the local airport to watch planes land and take-off but since this is a relatively small town, there wasn't any action. The boys were disappointed but were equally distracted by the McDonald's we picked up on the way. We also took a little trip to the grocery store and bought a French baguette. They thought it was so fun to be able to just rip off a chunk. If I had really been on the ball, I would have made this airplane as a craft, but again, some weeks are better than others.
 Week 7 - A Pair of Red Clogs
This was a book that interested my boys as they were so interested in the little girl's clogs. We talked about taking care of our things and being responsible - even with our shoes. I was preparing them for winter when they have to keep their tennis shoes out of the snow. We tossed our shoes to "predict the weather" and then we waited til the next morning to see if our "predictions" were right. I had him draw the Japanese flag in his journal along with drawing different facial expressions. Overall it was a good experience and I would recommend reading this book again.
 Week 8 - The Clown of God
This book, on the other hand, I had a little more trouble with. I found some activities but I had a difficult time explaining the meaning of the book. I talked about how important it is to be a light everywhere we go. And that our light shines to show Jesus' love as the monks showed love the the clown. When the clown dies in the end of the book (sorry to give away the ending) I explained out important it is for us to do our best for God all through our life. That we can give glory to God until the day we die. And I left it at that. I didn't want to go into the details of the statue changing its face and I'm glad they didn't ask for an explanation. :) I got a kit from the library with a CD and different color scarves so we danced and jungled along with the CD. The boys had a lot of fun with that. I had him draw pictures for the vocabulary words: juggle, eggplant, zucchini, torches, and monks (brothers). I don't know that I would necessarily teach this book again, but after reviewing what we did I think it was sufficient and they seemed to enjoy the activities we did through the week.
Week 9 - How to Make Apple Pie and See the World
We really enjoyed this book as we had been on a field trip to the apple orchard a few weeks earlier. We enjoyed "traveling" around the world for all the ingredients to make and apple pie since the grocery store was closed. I printed out a world map and we used a ruler and red marker (like Indiana Jones) and drew out our trip to each country. We also journaled all the countries and the ingredients we picked up while we were there. I found pictures of each mode of transportation, each country, and each food item. We pasted them into the journal and recorded the details of the trip. We made apple crisp on Friday to enjoy as dessert. It was a great week and we had so much fun traveling the world together.
Week 10 - Sick Week
This is the week I had the flu, so needless to say, we didn't get much done. We rearranged some things so that I could rest and the boys could play instead of having school. Lots of books were read while cuddling on the couch. Also, dad cooked dinner almost every night. :) That's looking at the glass half-full.
 Week 11 - Papa Piccolo
This was not what I expected at all. I expected this book to be about music, but it was about cats as the cover easily displays. And my boys LOVE cats (I am very allergic so I don't really enjoy them too much). We found Venice, Italy on the map and looked at pictures online of their "roads" which are really a series of canals. We talked about how much fun it would be if we traveled by boat instead of car. Or if we had to walk nearly everywhere. They thought that sounded like a great idea. We journaled drawings of the vocab words: canal, sardine, chime, carnival, glum, and gondola. We made a color wheel and practiced our addition using kitten counters. The boys loved talking about kittens and next time I would like to take them to the Humane Society to visit some kitties and cats.
 Week 12 - Grandfather's Journey
We didn't really get into this book. It was a little more difficult as the timeline of the book moved quickly and I don't think they realized that the character was the same because he aged so quickly through the book. We did take another look at Japan and made some hats out of paper - origami. We talked about days in a week and months in a year to note how time passes. We also discussed family generations - Great Gramma, Grandpa, Dad and them. And how each one has their own experiences because of the years they lived. We didn't really get into WWII but did discuss how each generation has ties to different parts of history.
And last week we played catch-up from the week when I was sick. So, we are back on track and that feels so good!! :) We've had a lot of fun incorporating other fun activities into our school days including:
Games:
Hi-Ho Cherry-O!
The Farming Game Kids
Printables:
Star Wars
Read, Build, Write
Super Mario Brothers
site word games and counting lots of objects.
It's been a great experience so far and we are really looking forward to our next books: Mike Mulligan and His Steam Shovel, Katy and the Big Snow and Stopping by Woods on a Snowy Evening.
What are you learning in your homeschool classroom? What are some good books that you recommend?

This was the week that Asher was sick so we did the minimum. We enjoyed reading about the Applachian experience through reading The Rag Coat. The only activity we did during this week was quilting. Yep, I let my little boy use my sewing machine - with LOTS of supervision. Plus he was terrified of getting stuck with a needle so he was pretty respectful of the machine. We took old scraps of fabric and sewed them together and added a piece of fabric to back it. It worked out well but I don't think I'll scare him with the sewing machine for a while. :)

We really enjoyed this book and learning some French names was a highlight (Blair-You). The boys loved laughing like French men, "Hugh, hugh, hugh!" :D Made me laugh!! We colored paper and made them into paper airplanes flying them across the yard. We also took a trip to the local airport to watch planes land and take-off but since this is a relatively small town, there wasn't any action. The boys were disappointed but were equally distracted by the McDonald's we picked up on the way. We also took a little trip to the grocery store and bought a French baguette. They thought it was so fun to be able to just rip off a chunk. If I had really been on the ball, I would have made this airplane as a craft, but again, some weeks are better than others.

This was a book that interested my boys as they were so interested in the little girl's clogs. We talked about taking care of our things and being responsible - even with our shoes. I was preparing them for winter when they have to keep their tennis shoes out of the snow. We tossed our shoes to "predict the weather" and then we waited til the next morning to see if our "predictions" were right. I had him draw the Japanese flag in his journal along with drawing different facial expressions. Overall it was a good experience and I would recommend reading this book again.

This book, on the other hand, I had a little more trouble with. I found some activities but I had a difficult time explaining the meaning of the book. I talked about how important it is to be a light everywhere we go. And that our light shines to show Jesus' love as the monks showed love the the clown. When the clown dies in the end of the book (sorry to give away the ending) I explained out important it is for us to do our best for God all through our life. That we can give glory to God until the day we die. And I left it at that. I didn't want to go into the details of the statue changing its face and I'm glad they didn't ask for an explanation. :) I got a kit from the library with a CD and different color scarves so we danced and jungled along with the CD. The boys had a lot of fun with that. I had him draw pictures for the vocabulary words: juggle, eggplant, zucchini, torches, and monks (brothers). I don't know that I would necessarily teach this book again, but after reviewing what we did I think it was sufficient and they seemed to enjoy the activities we did through the week.

Week 9 - How to Make Apple Pie and See the World
We really enjoyed this book as we had been on a field trip to the apple orchard a few weeks earlier. We enjoyed "traveling" around the world for all the ingredients to make and apple pie since the grocery store was closed. I printed out a world map and we used a ruler and red marker (like Indiana Jones) and drew out our trip to each country. We also journaled all the countries and the ingredients we picked up while we were there. I found pictures of each mode of transportation, each country, and each food item. We pasted them into the journal and recorded the details of the trip. We made apple crisp on Friday to enjoy as dessert. It was a great week and we had so much fun traveling the world together.
Week 10 - Sick Week
This is the week I had the flu, so needless to say, we didn't get much done. We rearranged some things so that I could rest and the boys could play instead of having school. Lots of books were read while cuddling on the couch. Also, dad cooked dinner almost every night. :) That's looking at the glass half-full.

This was not what I expected at all. I expected this book to be about music, but it was about cats as the cover easily displays. And my boys LOVE cats (I am very allergic so I don't really enjoy them too much). We found Venice, Italy on the map and looked at pictures online of their "roads" which are really a series of canals. We talked about how much fun it would be if we traveled by boat instead of car. Or if we had to walk nearly everywhere. They thought that sounded like a great idea. We journaled drawings of the vocab words: canal, sardine, chime, carnival, glum, and gondola. We made a color wheel and practiced our addition using kitten counters. The boys loved talking about kittens and next time I would like to take them to the Humane Society to visit some kitties and cats.

We didn't really get into this book. It was a little more difficult as the timeline of the book moved quickly and I don't think they realized that the character was the same because he aged so quickly through the book. We did take another look at Japan and made some hats out of paper - origami. We talked about days in a week and months in a year to note how time passes. We also discussed family generations - Great Gramma, Grandpa, Dad and them. And how each one has their own experiences because of the years they lived. We didn't really get into WWII but did discuss how each generation has ties to different parts of history.
And last week we played catch-up from the week when I was sick. So, we are back on track and that feels so good!! :) We've had a lot of fun incorporating other fun activities into our school days including:
Games:
Hi-Ho Cherry-O!
The Farming Game Kids
Printables:
Star Wars
Read, Build, Write
Super Mario Brothers
site word games and counting lots of objects.
It's been a great experience so far and we are really looking forward to our next books: Mike Mulligan and His Steam Shovel, Katy and the Big Snow and Stopping by Woods on a Snowy Evening.
What are you learning in your homeschool classroom? What are some good books that you recommend?
Friday, November 25, 2011
Pumpkin Pie
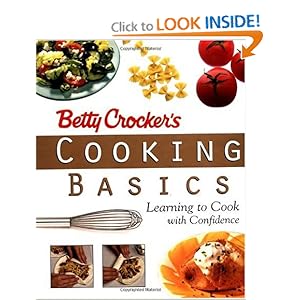
Anyway, on to the recipe...
Pumpkin Pie
from Betty Crocker
1 frozen deep-dish pie shell
2 eggs
1/2 cup sugar
1 tsp ground cinnamon
1/2 tsp salt
1/2 tsp ground ginger
1/8 tsp ground cloves
1 can (16oz) pumpkin (not pumpkin pie filling)
1 can (12oz) evaporated milk (not sweetened condensed milk)
whipped cream or Cool-Whip
1. Preheat oven to 425 degrees. Set out frozen pie shell to thaw.
2. Beat eggs slightly in a large bowl with a wire whisk or hand beater. Beat in the sugar, cinnamon, ginger, cloves, pumpkin and milk.
3. To prevent spilling, place pastry-lined pie shell on a cookie before adding filling. Carefully pour the pumpkin filling into the pie plate. (There will be extra so don't let it overflow - I put the extra in a little ramekin to enjoy later.) Bake 15 minutes.
4. Reduce the oven temperature to 350 degrees. Bake about 45 minutes longer or until knife inserted in the center comes out clean. Place on a wire cooling rack after baking. If after 4-6 hours the pie has not been served, cover and refrigerate.
5. Serve pie with whipped cream or Cool-Whip. Cover remaining pie up to three days.
Easy-peasy. Enjoy!!
Wednesday, November 23, 2011
Prepping for Thanksgiving
This year for Thanksgiving my sister and her two kids are coming!! We are so happy to host them in our new home and are so thankful for the extra room so they can stay with us. Therefore, I've been cooking up a storm! And I love that kind of weather. :)
First of all, I did all my non-perishable and frozen shopping last week and this week I picked up the fresh produce and my regular items. It made the shopping a lot less overwhelming.
And I've learned that it is ultra-helpful to have a plan when you have guests coming. So, here's the plan (and some of the recipes) for Thanksgiving:
breakfast
banana bread (bake on Wednesday)
cinnamon rolls (refrigerated from the can)
fruit
11am - appetizers
BLT dip with Wheat Thins (prep on Wednesday and mix together on Thursday)
veggies and dip
fruit
1p - Thanksgiving
turkey (Thursday)
mashed potatoes (Thursday)
sweet potatoes (cook on Wednesday, bake on Thursday)
green bean casserole (prep on Wednesday, bake on Thursday)
stuffing (prep on Wednesday, bake on Thursday)
dilled corn (Thursday)
brown and serve rolls (Thursday)
cranberry sauce (Wednesday)
7-layer rainbow jell-o (Wednesday)
layered lettuce salad (Wednesday)
3p - dessert
pumpkin pie (Wednesday)
scotcheroos (Tuesday)
chex mix (Tuesday)
dinner
LEFTOVERS :)
It's been fun using all the pots and pans in my kitchen. Finding my casserole dishes still packed in boxes and using my Pampered Chef chiller veggie platter. My boys have also been handy in the kitchen and we've had lots of fun learning together. They're learning how to pour and stir without spilling, how to clean up as you go, how it's important to taste everything (they really like that part), and how to have fun. I've been learning how much they love being in the kitchen and that they're more likely to eat the food that they helped make. I've also been learning to let them have fun, and that includes being messy. I am teaching them to be careful, but I'm not the neatest cook in town so I shouldn't expect them to be either. And it's been fun singing to Christmas music while we cook.
How do your kids participate in the holidays? Do you dare ask them to help in the kitchen? :)
Happy Thanksgiving to "all" my readers!!
First of all, I did all my non-perishable and frozen shopping last week and this week I picked up the fresh produce and my regular items. It made the shopping a lot less overwhelming.
And I've learned that it is ultra-helpful to have a plan when you have guests coming. So, here's the plan (and some of the recipes) for Thanksgiving:
breakfast
banana bread (bake on Wednesday)
cinnamon rolls (refrigerated from the can)
fruit
11am - appetizers
BLT dip with Wheat Thins (prep on Wednesday and mix together on Thursday)
veggies and dip
fruit
1p - Thanksgiving
turkey (Thursday)
mashed potatoes (Thursday)
sweet potatoes (cook on Wednesday, bake on Thursday)
green bean casserole (prep on Wednesday, bake on Thursday)
stuffing (prep on Wednesday, bake on Thursday)
dilled corn (Thursday)
brown and serve rolls (Thursday)
cranberry sauce (Wednesday)
7-layer rainbow jell-o (Wednesday)
layered lettuce salad (Wednesday)
3p - dessert
pumpkin pie (Wednesday)
scotcheroos (Tuesday)
chex mix (Tuesday)
dinner
LEFTOVERS :)
It's been fun using all the pots and pans in my kitchen. Finding my casserole dishes still packed in boxes and using my Pampered Chef chiller veggie platter. My boys have also been handy in the kitchen and we've had lots of fun learning together. They're learning how to pour and stir without spilling, how to clean up as you go, how it's important to taste everything (they really like that part), and how to have fun. I've been learning how much they love being in the kitchen and that they're more likely to eat the food that they helped make. I've also been learning to let them have fun, and that includes being messy. I am teaching them to be careful, but I'm not the neatest cook in town so I shouldn't expect them to be either. And it's been fun singing to Christmas music while we cook.
How do your kids participate in the holidays? Do you dare ask them to help in the kitchen? :)
Happy Thanksgiving to "all" my readers!!
Friday, November 4, 2011
Planning a Superhero Birthday
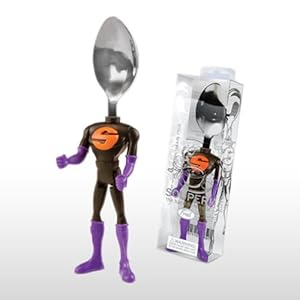
This month my youngest turns four! He's been requesting a superhero birthday party for a few months (without changing his mind - a miracle) so we're going with that. He's requested a "Scooperhero" birthday cake since we received this as a gift from two former students:

He uses this delightful spoon to eat his breakfast every morning but I'm wondering how that's going to make it onto a cake. And he's also requesting that we change the colors to cardinal and gold for Iowa State (his favorite team). So I've been trying to accommodate his requests while not driving myself to the loony-bin.
Here's a few ideas I've been focusing on...
Food
We want to keep it simple so we're thinking cupcakes, a few snacks and some drinks.
chocolate cupcakes with toppers (from Fabulous Features)

other fun snacks with these "labels" (from 3 Sweet P's)

I thought about bottled pop so I can put a cute "FIZZZ" label on them, but we're dealing with preschoolers so we might be sticking to juice-boxes instead...or sippy cups. :)
Decor
Again, focusing on keeping it simple, we're going to have a few signs around and maybe a banner or two. And food is always a great way to decorate simply.
great signage (from Love the Day)

Party Favors
In our area it's customary to send home some treats/favors for each child attending the party. I don't want to spend a lot of money on this but I still want it to be fun.
a mask for each guest when they arrive, adults too? (from 3 Sweet P's)

a Superhero lollipop (from Zakka Life)

and maybe a Superhero bookmark and some Pop Rocks all in a cute Superhero bag.
And then I'll purchase some plates, napkins and cups and we'll call it good. That means I have some work to do. :)
Have any great Superhero-party-planning advice for this Super Mama?
He uses this delightful spoon to eat his breakfast every morning but I'm wondering how that's going to make it onto a cake. And he's also requesting that we change the colors to cardinal and gold for Iowa State (his favorite team). So I've been trying to accommodate his requests while not driving myself to the loony-bin.
Here's a few ideas I've been focusing on...
Food
We want to keep it simple so we're thinking cupcakes, a few snacks and some drinks.
chocolate cupcakes with toppers (from Fabulous Features)

other fun snacks with these "labels" (from 3 Sweet P's)

I thought about bottled pop so I can put a cute "FIZZZ" label on them, but we're dealing with preschoolers so we might be sticking to juice-boxes instead...or sippy cups. :)
Decor
Again, focusing on keeping it simple, we're going to have a few signs around and maybe a banner or two. And food is always a great way to decorate simply.
great signage (from Love the Day)

Party Favors
In our area it's customary to send home some treats/favors for each child attending the party. I don't want to spend a lot of money on this but I still want it to be fun.
a mask for each guest when they arrive, adults too? (from 3 Sweet P's)

a Superhero lollipop (from Zakka Life)

and maybe a Superhero bookmark and some Pop Rocks all in a cute Superhero bag.
And then I'll purchase some plates, napkins and cups and we'll call it good. That means I have some work to do. :)
Have any great Superhero-party-planning advice for this Super Mama?
Subscribe to:
Posts (Atom)